
HOWTO - Smoothwall - Linux Router/Firewall
By Erik Rodriguez
This article is a HOWTO on the installation and configuration of a dedicated Linux router/firewall using Smoothwall. Smoothwall also includes popular services such as SQUID, Snort, Cron, SSH, and more.
Introduction
Smoothwall is a simple Linux kernel built to run as a dedicated firewall/router. Using smoothwall is a great way to gain extra capability with NAT that you don't get from the cheap Linksys routers. Smoothwall is highly stable, and will run on a variety of hardware. It uses IPTABLES to control and route traffic. This is an improvement over earlier version of Smoothwall that used IPCHAINS. The machine can be fully administered from a simple web-interface, but you still have the ability to SSH into the machine. This HOWTO is specific to SmoothWall Express 2.0. The next few sections will show you how to install and configure your Smoothwall box.
Requirements
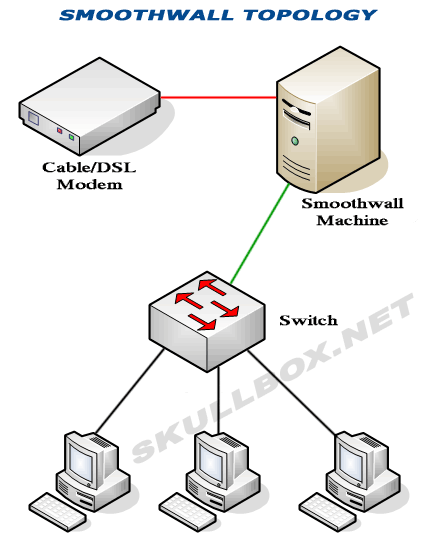
As I mentioned above, Smoothwall will run a variety of hardware. It's recommended you use a machine that is 166 MHz or faster. Although, I've heard of people running Smoothwall on machines as slow as 33 MHz. In any case, you will need at least 2 network cards (NICs) in your Smoothwall machine. After all, a true "firewall" is a machine with 2 or more network interfaces. You may or may not need a crossover cable as well. The switch I use (Dell Powerconnect 2650) performs auto-sensing, so there is no need to ever use a crossover cable. You can see the topology is displayed below:
Specs
The specs for the machine I used are listed below:
- 1U server
- AMD Duron 1100
- 512 MB PC133 SDRAM
- 20 GB IDE Hard Drive
- 10/100 On-board NIC
- Intel Pro 100+ NIC
Click to Enlarge


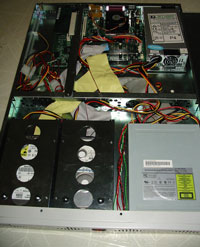
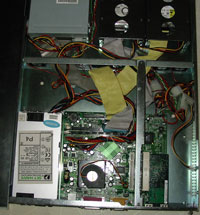
For the purpose of this machine, the hardware I used was a complete over-kill. This machine could run as a fairly decent file/web server. The CD writer won't get any use because Smoothwall does not have that functionality. However, it was the only extra machine I had to use. The next section will inform you of certain things you should know about the setup process.
Installation
The installation is pretty straight-forward. Make sure you have your BIOS set to boot from a CD, and the installation process begins automatically. Remember, that installing this will delete everything on your hard drive. A format is required for the installation to begin. Depending on how large your hard drive is, the format and file copy process should not take long. When it is all finished, Smoothwall will probe your machine for network interfaces.
Networking
During this installation, I used only 2 network cards. One for connection to the modem, and one for connection to the switch. There are several popular methods for network interface configurations. In Smoothwall, each interface is assigned a "color" corresponding to it's purpose. The common interfaces are listed below:
| RED: |
Internet. This interface is protected by the IPTABLES firewall rules. |
| ORANGE: |
Filtered/Special Purpose. This is commonly used for a DMZ, or other special section you want to allocate. |
| GREEN: |
Trusted network. All traffic permitted to and from this interface. |
If you have two of the same NICs, you may want to pay attention to the MAC addresses so you know which cable to connection to your modem, and which one goes to your switch. The safest way to setup your RED interface, is to use DHCP. This way, all the DNS, gateway, and IP information is automatically done for you. Your GREEN interface should have a static IP (192.168.0.1) to connect your LAN. Once you have your interfaces setup correctly, reboot the machine. Remember to power cycle your modem! Often ISPs will assign you a different IP when the MAC address of the device attached to you modem changes. I recommend that you have everything working 100% before you remove the monitor and keyboard. I had some initial problems SSHing (my new word) into the machine after I had disconnected all that stuff and moved the machine to a different room.
Web Interface
Once you reboot the machine, you can access it from a web interface (usually https://192.168.0.1:441). Express version 2.0 added the ability to use HTTPS. You can also access it using port 81, but I chose to remove that listening port in the apache.conf file. The next few sections show the administration and features of the web interface.
Management
Without logging in, you can see some of the management menu, version, and load averages. You can also view the credits if you want to :) If you want to see or change anything else, you must login. During the configuration process you were asked to specify some passwords. To login to the web interface, you must use admin as the user name and the password you specified. Logging in as root will only work over SSH or from the console. You cannot login as root using the web interface.
You can view the status of the machine at all times with various options. Configuration and resources are presented in text form. Below is the output from my Smoothwall machine:
Memory:
  Total Used Free   Used % Shared Buffers Cached
Mem: 508532K 115856K 392676K   22%
 0K 43580K 32332K
Swap: 24088K 0K 24088K   0%
--------------------------------------------------------------------------------
Total: 532620K 115856K 416764K   21%


Disk usage:
Filesystem Mount point Size Used Available   Used %
/dev/harddisk4 / 15G 169M 13G   2%

/dev/harddisk1 /boot 7.6M 4.4M 2.8M   61%

/dev/harddisk3 /var/log 3.7G 62M 3.4G   2%


Inode usage:
Filesystem Mount point INodes Used Free   Used %
/dev/harddisk4 / 1954560 13165 1941395   1%

/dev/harddisk1 /boot 2008 28 1980   2%

/dev/harddisk3 /var/log 489600 85 489515   1%


Uptime and users:
  4:06pm  up  3:30,  1 user,  load average: 0.00, 0.01, 0.00
USER     TTY      FROM              LOGIN@   IDLE   JCPU   PCPU  WHAT
root     ttyp0    192.168.0.15      3:38pm 28:15   0.07s  0.07s  -bash
|
You can also see a quick visual of all the services running on the Smoothwall box:
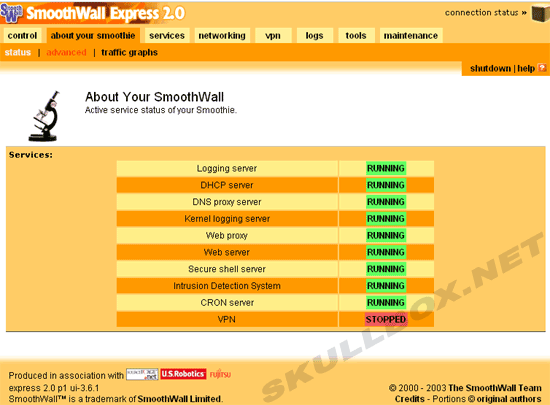
You should pay special attention to the services tab. You have the ability to run:
To enable the web proxy, you must enable it by checking the "check box." I have highlighted in green the web proxy information that needs to be changed. See below:
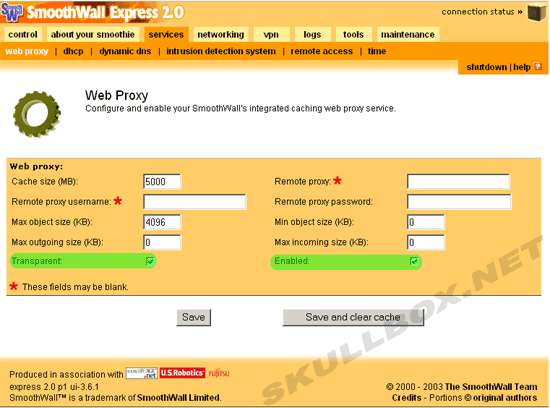
Transparent simply means that every client on your network will be forced to connect through the proxy server. Browser settings will not need to be changed, and the clients will not even know they are using the proxy. I changed cache size from 50 to 5000 MB. I would not recommend changing the other options. Caching objects too large or too small can create problems.
Snort can be enabled just like SQUID by checking the check box. I did enable snort, just for the hell of it. However, after reviewing it's logs, I found that it produces A LOT of false positives. Connections to and from torrent trackers are sometimes flagged as incoming port scans. You may be able to modify the snort settings by editing a config file through SSH. Using the web-interface does not give you this functionality.
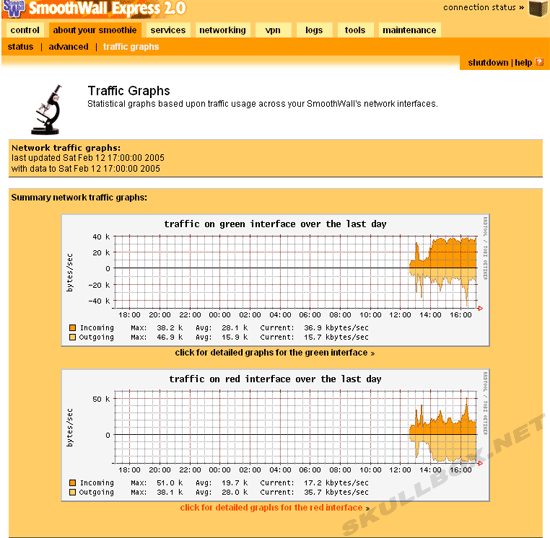
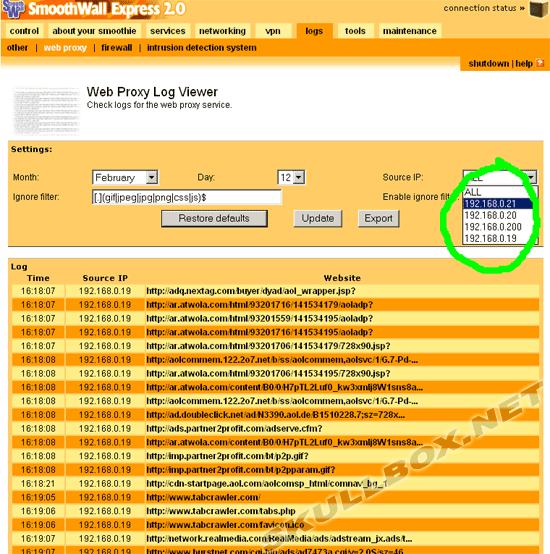
One of the coolest things about Smoothwall is the ability to view network usage. You can view graphs of network traffic generated by RRDtool every 5 minutes. You can also view the logs of web usage through the proxy. You can dig further by filtering the log by IP. This way, you can see all the websites visited by a certain IP (or user). See the screen shots below:
Troubleshooting...
Initially, I could not SSH into the machine because port 22 was not open. I had SSH enabled, but couldn't figure out what was going on. Eventually, I figured out that port 222 was open. This enables you to tunnel different SSH connections through one. However, I simply edited the sshd_config file which was buried in some unusual location. I tried to find it again to mention in the article and could not! Why they chose to bury that file in the system somewhere, I have no idea?!?!?
The problem with using Smoothwall from the console is that bash is not very friendly. In order to keep the size of Smoothwall down, they did not include all the options like whereis or locate which makes it a little hard to find everything. Config files are stored in non-traditional Linux locations, and partitions are not named according to standards. For instance, the snort.conf is stored in /etc and the squid.conf file is stored in /var/smoothwall/proxy :)
If you are having trouble with the networking aspect, you still have tools such as ping, traceroute, and tcpdump. They are all useful in detertminig what your network problem may be. Remember what I said about the crossover cable. I am not sure but the cable from your GREEN interface may or may not need to be a crossover cable. If you are using a motorola surfboard modem (like me) you can view some info from within the modem via a web interface (http://192.168.100.1) This will help if you are un-sure why your RED interface isn't working.
While Smoothwall does not natively contain an FTP server, files can still be transferred to and from the box via SCP/SFTP. To do so, simply connect to port 22 or 222 with a client such as WinSCP3. It's nearly the same as using an other FTP client. You can download it here. As far as adding services or packages, I am not sure it is possible. If you really know how to hack up the kernel, I'm sure it can be done. But remember the kernel running Smoothwall is very low-end. It does not have support "out of the box" for installing and compiling packages. Happy Routing ;)
Contact Us
NOTE: this form DOES NOT e-mail this article, it sends feedback to the author.
|
|
